How To Reset Apple Passcode: A Comprehensive Guide
Resetting your Apple passcode can seem daunting, especially if you find yourself locked out of your device. However, understanding the right steps can make this process straightforward and efficient. In this article, we will provide you with detailed instructions on how to reset your Apple passcode, ensuring that you regain access to your device without unnecessary hassle. Whether you have forgotten your passcode or simply wish to change it for security reasons, we have you covered.
The ability to reset your Apple passcode is essential for maintaining the security and privacy of your personal information. With the increasing reliance on mobile devices for storing sensitive data, knowing how to manage your passcode becomes even more crucial. In the following sections, we will explore various methods for resetting your passcode, including using iTunes, iCloud, and recovery mode.
So, if you’re ready to regain access to your device, let’s dive into the details and discover the best ways to reset your Apple passcode effectively. By following our guide, you will not only reset your passcode but also gain insight into how to prevent similar issues in the future.
Table of Contents
Understanding Apple Passcodes
Apple passcodes are essential for securing your iPhone, iPad, or iPod touch. They serve as the first line of defense against unauthorized access to your data. The passcode must be entered to unlock the device, and it also protects sensitive information such as photos, messages, and applications.
There are different types of passcodes you can set on your Apple device:
- 4-Digit Numeric Code: A simple passcode consisting of four digits.
- 6-Digit Numeric Code: A more secure option that requires six digits.
- Alphanumeric Code: A passcode that combines letters and numbers for enhanced security.
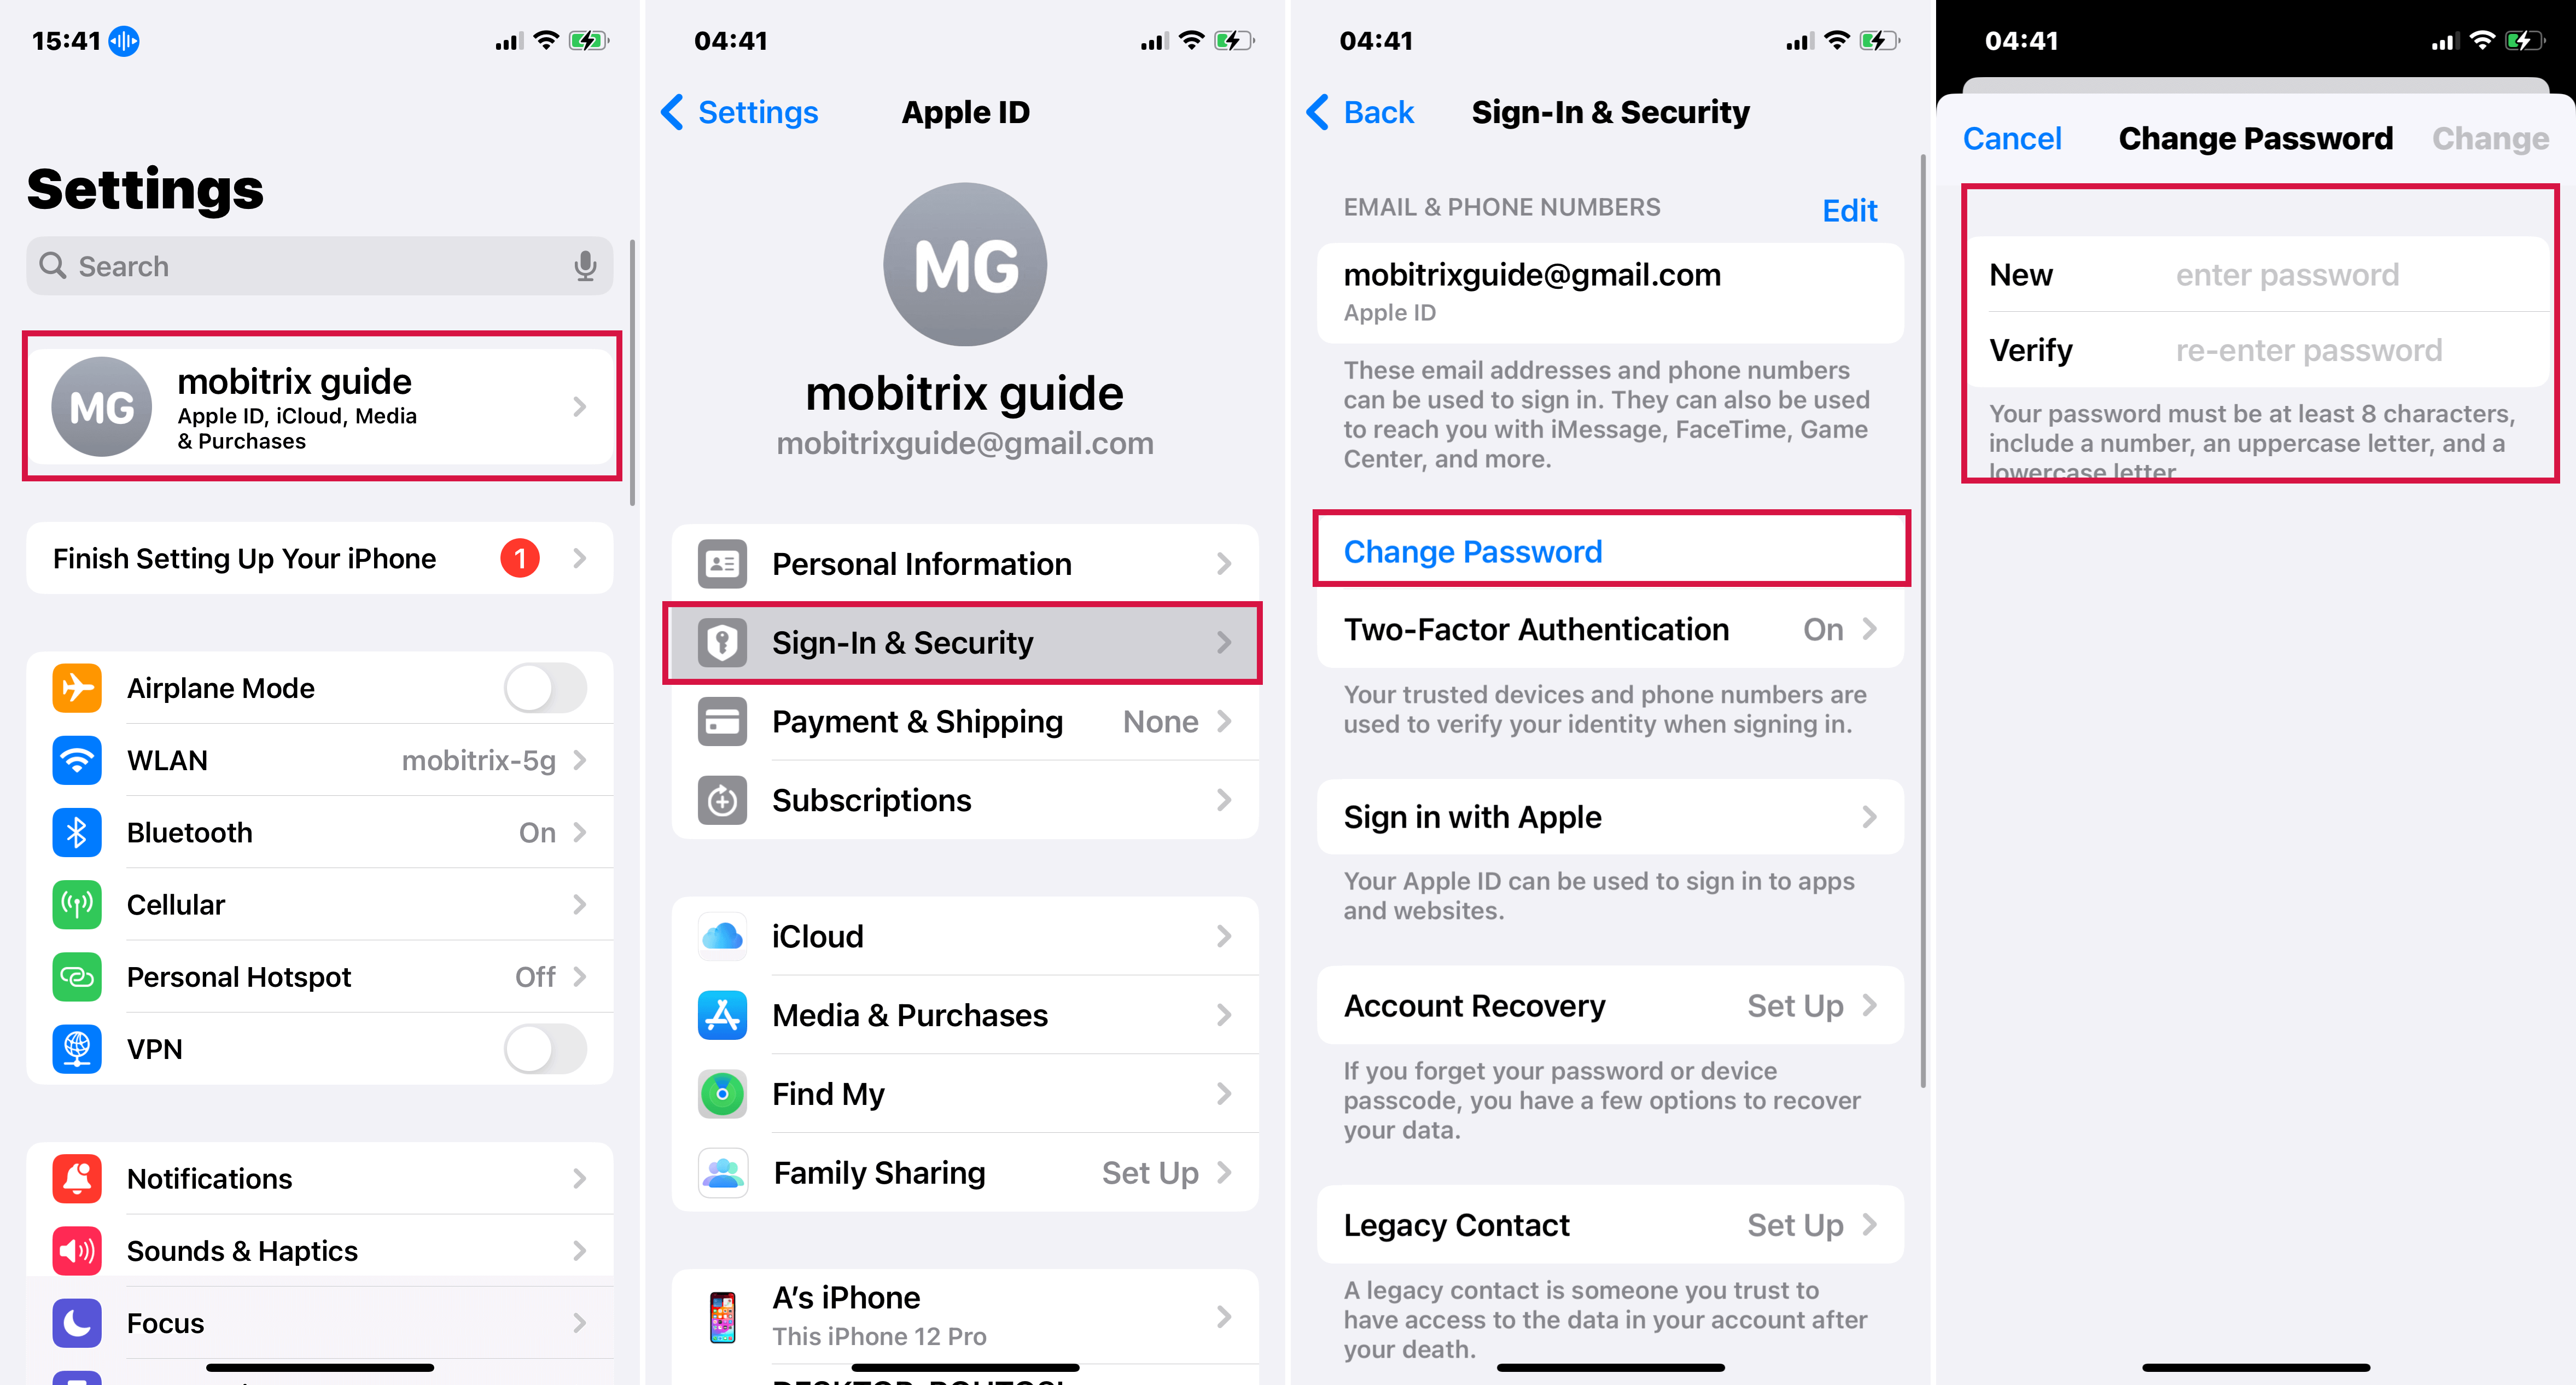
Methods to Reset Apple Passcode
If you find yourself locked out of your device, there are several methods available to reset your Apple passcode. Below, we will outline the two most common methods: using iTunes and using iCloud.
Using iTunes
Resetting your Apple passcode using iTunes is a straightforward process. Follow these steps:
Note: This method will erase all data on your device unless you have a backup.
Using iCloud
If you have enabled Find My iPhone, you can reset your passcode using iCloud. Here’s how:
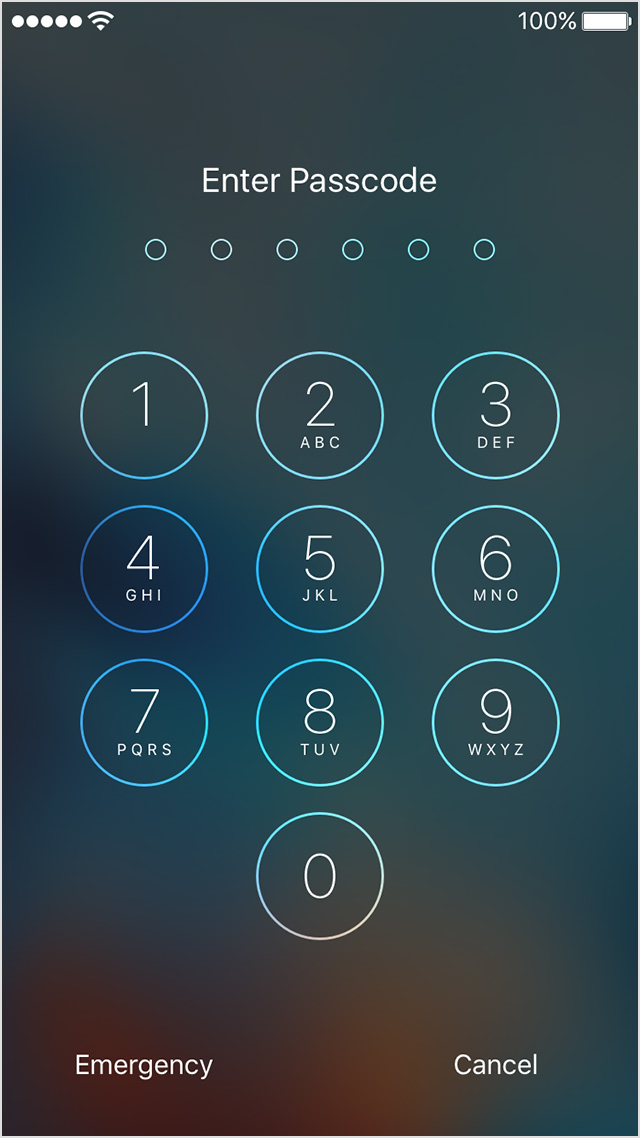
Using Recovery Mode
If neither of the above methods works, you can utilize Recovery Mode to reset your passcode. Follow these steps:
- iPhone 8 or later: Press and quickly release the Volume Up button, press and quickly release the Volume Down button, then press and hold the Side button until you see the recovery mode screen.
- iPhone 7 and 7 Plus: Press and hold the Volume Down and Side buttons simultaneously until you see the recovery mode screen.
- iPhone 6s and earlier: Press and hold the Home and Top (or Side) buttons simultaneously until you see the recovery mode screen.
Preventing Future Lockouts
To avoid being locked out of your Apple device in the future, consider the following tips:
- Choose a passcode that you can remember but is difficult for others to guess.
- Regularly update your passcode and avoid using easily accessible information (like birthdays).
- Utilize the Face ID or Touch ID features for convenience and security.
- Keep your Apple ID and password secure, as they are crucial for account recovery.
If you have tried all the methods above and still cannot reset your passcode, it may be time to contact Apple Support. They can provide assistance and guidance tailored to your specific situation. Additionally, if you suspect your device has been compromised, seeking professional help is essential.
Conclusion
Resetting your Apple passcode is a necessary skill that every Apple device user should have. By following the methods outlined in this guide—using iTunes, iCloud, or Recovery Mode—you can regain access to your device quickly and efficiently. Remember to take preventive measures to avoid future lockouts and keep your personal information secure.
If you found this article helpful, please consider leaving a comment below or sharing it with others who may benefit from this information. Additionally, explore our other articles for more tips and tricks on managing your Apple devices.
Thank you for reading, and we look forward to seeing you back on our site for more valuable insights!
Also Read
Article Recommendations
:max_bytes(150000):strip_icc()/004_when-you-forget-apple-id-password-2000489-5c4238f246e0fb000121ce24.jpg)
ncG1vNJzZmivp6x7tMHRr6CvmZynsrS71KuanqtemLyue9KtmKtlpJ64tbvKamdoqpWosrV5wKmnpZ1dpa60v8Kom55mmKm6rQ%3D%3D